Product Guide
Instalación de la estación
Llegó la hora de poner tu FieldKit a funcionar y empezar a registrar datos ambientales afuera.
Lleva la estación al lugar de instalación, elige una frecuencia para la captura de datos y documenta el proceso. Cuanta más información recabes en fotografías y notas de campo durante la instalación, mayor será el contexto con el que tú y tu equipo podrán trabajar cuando analicen los datos posteriormente.
Consideramos que la documentación es importante. Así que, aunque las primeras versiones de FieldKit empiezan a registrar datos de forma automática, estamos trabajando en una nueva función para ayudar a los usuarios a darse cuenta de las ventajas de realizar la instalación para empezar a registrar los datos. Este manual del producto se redactó pensando en eso.
1. Posiciona la estación de forma segura
¡Fija la caja a un poste o a un árbol utilizando herramientas no invasivas para que la estación esté protegida de la intemperie y de los animales curiosos!
Tenemos entradas del blog que describen cómo pensar a través de la instalación de la estación en más detalles:
-Despliegue de la Estación Meteorológica FieldKit para principiantes
-FieldKit va a Brooklyn: Consejos, trucos y lecciones aprendidas para el despliegue de FieldKit
-FieldKit va a Brooklyn: Despliegue de agua FieldKit (Próximamente)
-FieldKit va a Brooklyn: Despliegue de Distancia de FieldKit (Próximamente)
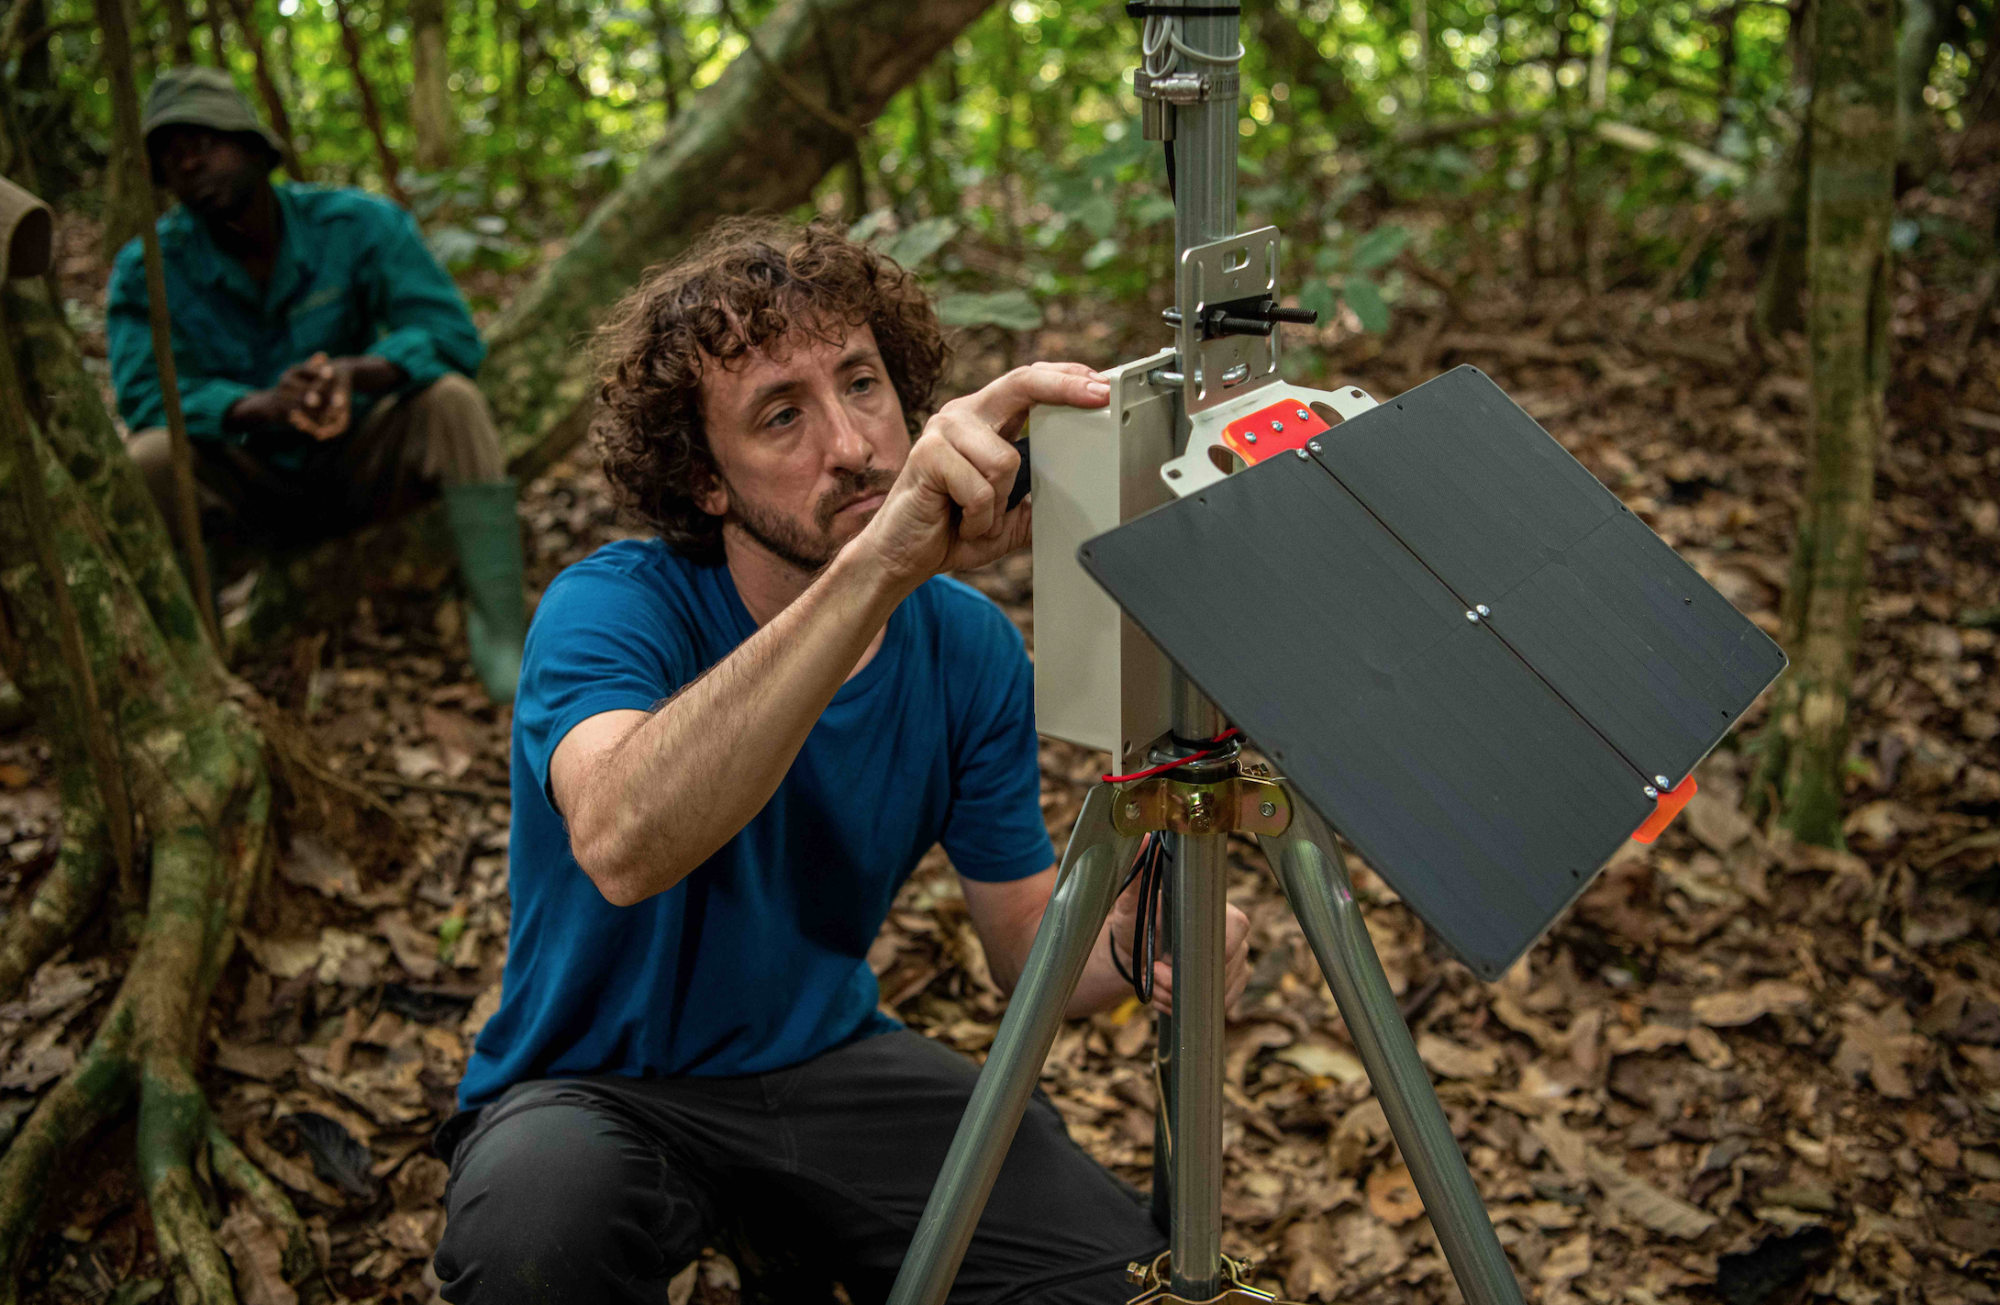
2. Instala la estación
Una vez que la estación esté asegurada, revisa que los instrumentos externos como las sondas y el sistema meteorológico estén colocados correctamente. Para obtener más información, consulte nuestras instrucciones generales de atención y la guía de despliegue específica del sensor a continuación.
Asegúrate de que las fuentes de energía estén en su lugar (batería, micro-USB o panel solar). Consulte la sección Configurar la para obtener información sobre cómo configurar su panel solar si está utilizando uno.
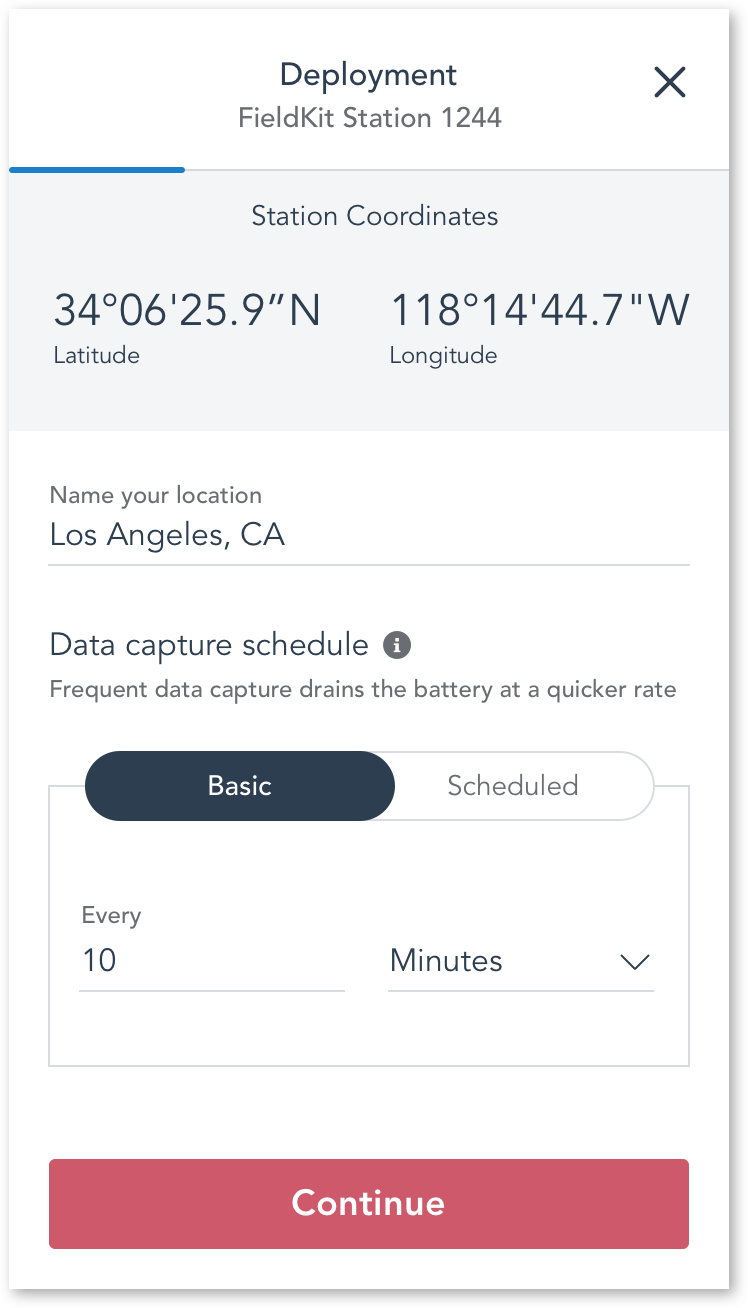
3. Ponle un nombre a la ubicación de la instalación
Ponle un nombre a la ubicación dentro de la aplicación para poder recordarla en el futuro. Dependiendo de tu conectividad, también detectaremos tus coordenadas GPS o localizaremos tu posición en un mapa.
El horario de captura de datos predeterminado cuando una estación no está conectada a la aplicación es de 1 hora. Cuando una estación está conectada a la aplicación, el horario de captura de datos es cada 10 segundos, excepto el de conductividad que es de 1 minuto (que no puede ser más frecuente para mantener la precisión). Cuando una estación está conectada a la aplicación, el horario de captura de datos será el descrito, independientemente de a qué se haya cambiado.
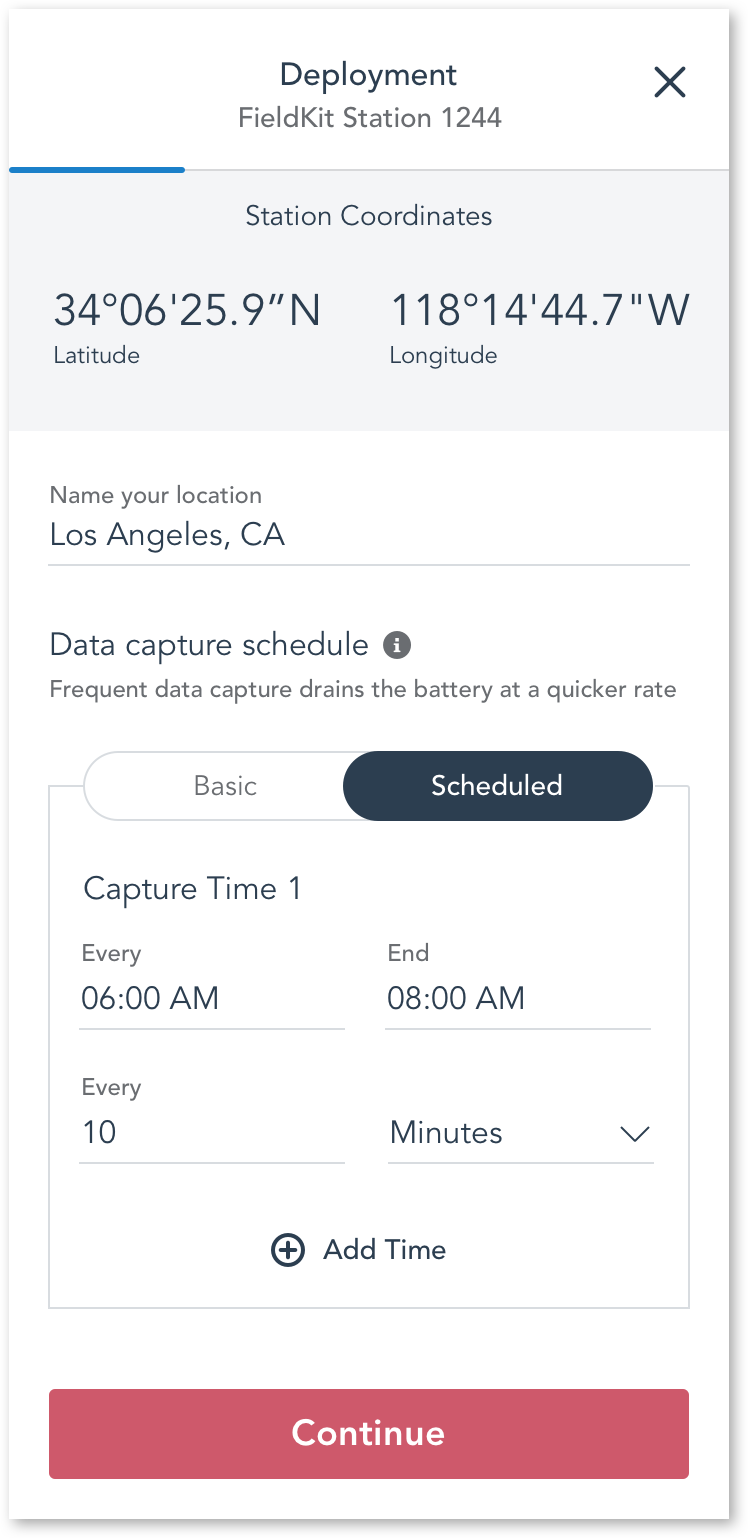
4. Define el horario de captura de datos
Revisa la aplicación FieldKit para asegurarte de que todos los sensores siguen recibiendo datos en tiempo real. Estos datos no se están registrando en estos momentos. La estación FieldKit no registrará los datos sino hasta que completes el proceso de instalación y presiones “Grabar Datos” (“Record Data”).
Define tu horario preferido para la captura de datos. Indica cuándo y en qué intervalo se deben registrar los valores de los datos. Ten en cuenta que a intervalos más frecuentes de captura de datos la batería se agotará más rápido.
Selecciona el tipo de horario de captura de datos que deseas:
Horario simple para la captura de datos
Configura la estación para registrar datos en un intervalo determinado de minutos u horas. Resulta útil para proyectos que requieren una cantidad constante de datos durante un periodo de 24 horas.
Ejemplo: Cada 5 minutos
Ejemplo: Cada 1 hora
Horario complejo para la captura de datos
Configura la estación para que registre los datos en uno o varios momentos específicos del día, cada uno de ellos con un intervalo de minutos u horas determinado. Puede ser útil para proyectos en los que la mayoría de los datos se obtienen mejor en función de ciertos acontecimientos, como el amanecer o el atardecer, por lo que ahorrarás batería al no grabar (en absoluto o a la misma velocidad) durante todo el día.
Ejemplo:
Tiempo de captura 1: Comienza a las 04:00, termina a las 07:00 y se graba cada 1 minuto
Tiempo de captura 2: Comienza a las 07:00, termina a las 17:00 y se graba cada 1 hora
Tiempo de captura 3: Comienza a las 17:00, termina a las 19:00 y se graba cada 1 minuto
Tiempo de captura 4: Comienza a las 19:00, termina a las 04:00 y se graba cada 1 hora
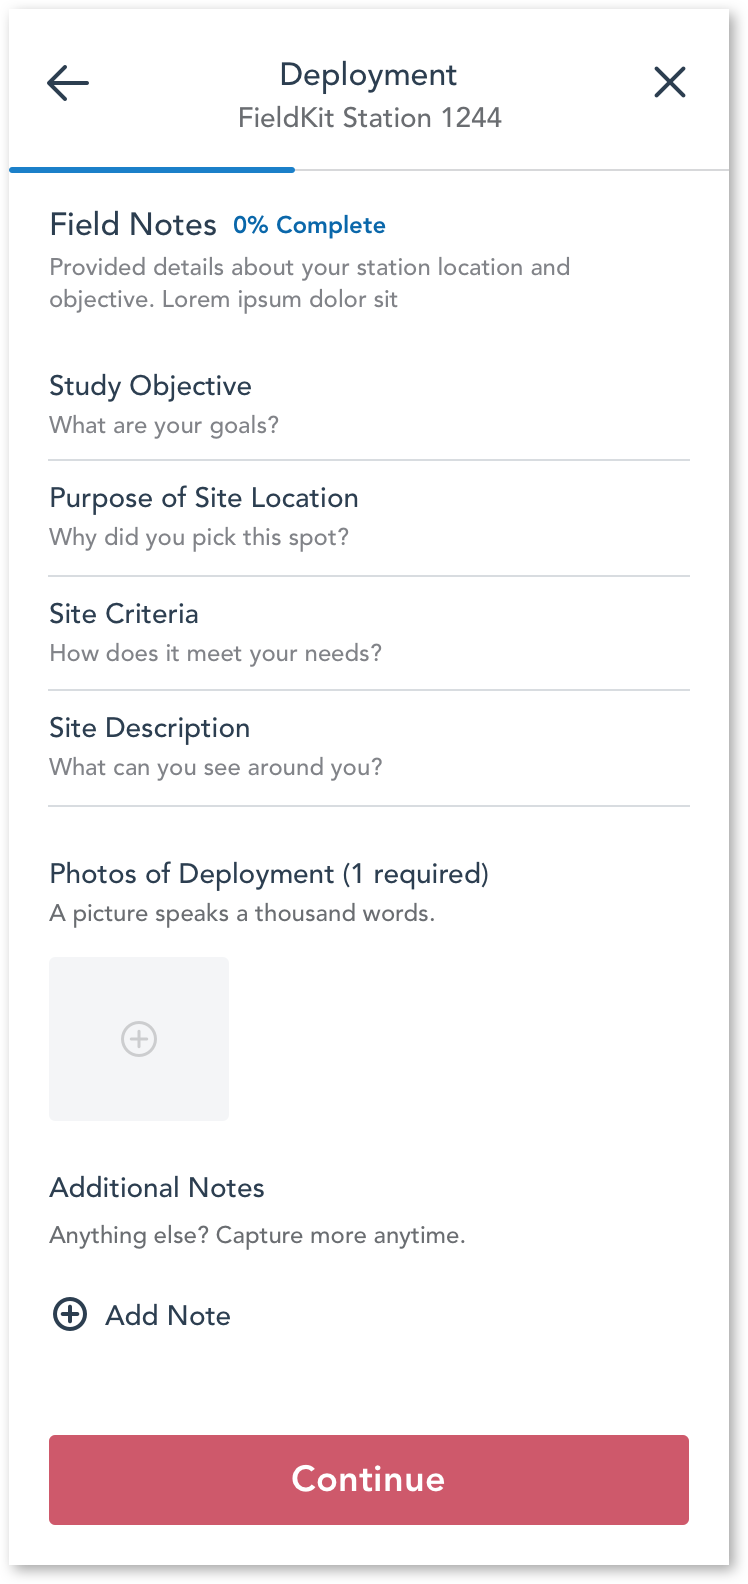
5. Documenta las condiciones de instalación por medio de notas
Al ofrecer algo de contexto sobre tu instalación, no solo ayudas a la comunidad en general a entender mejor su entorno, sino que también ayudas a tu futuro yo y a tus compañeros de equipo a tener una perspectiva más clara de los datos.
Además, si tu estación presenta problemas, un poco de trabajo administrativo ahora podría ahorrarte mucho tiempo y problemas en el futuro, especialmente si tu estación FieldKit está instalada en un lugar remoto.
Empieza con algunas notas. Si tienes las manos ocupadas, puedes grabarte con la aplicación para registrar tus ideas del momento. Para ello, haz clic en una sección de las Notas de Campo y, luego, en el ícono del micrófono que se encuentra en la parte inferior derecha de la pantalla. De lo contrario, escribe notas detalladas que puedan servir de referencia para el análisis de los datos y para futuras visitas a la estación.
Después, toma algunas fotos de tu estación FieldKit ya instalada y de la zona que la rodea. ¿Está cerca de puntos de referencia? ¿Hay algún peligro alrededor?
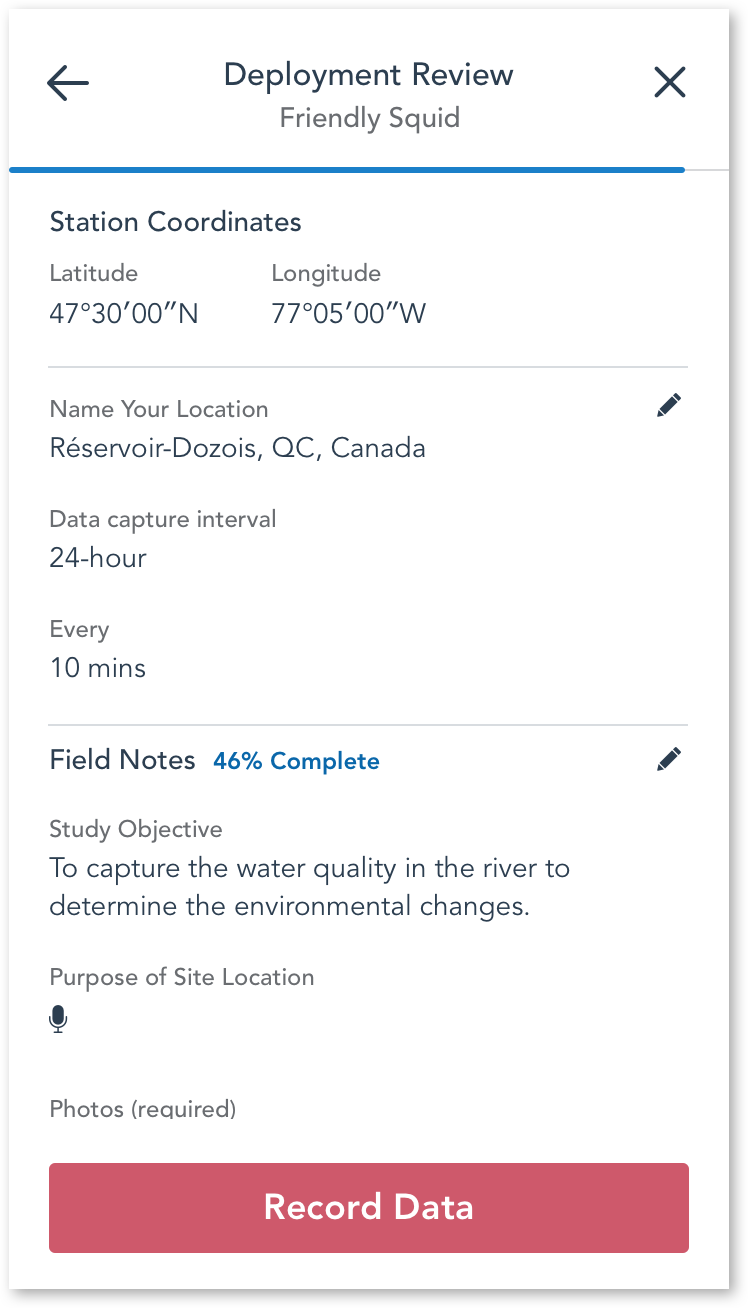
6. Presiona “Record Data” para comenzar la captura de los datos
Vuelve a verificar la página de «Deployment Review» (revisión de la instalación). ¿La información es correcta? Revisa todo como si fueras una versión futura de ti mismo o un nuevo participante en el estudio. ¿Podrías entenderlo todo? ¡Muy bien! Todo listo para comenzar a registrar datos. Haz clic en “Grabar datos” (“Record data”).
7. ¡Felicidades! Ahora registra algunos datos iniciales
Ya está instalada y registrando datos. Recomendamos que te quedes a tomar algunos valores para sincronizar esa captura de datos inicial con la aplicación FieldKit. Esto comprobará si tu FieldKit está registrando los datos correctamente.
Si tus valores parecen un poco equivocadas al principio, ¡no te preocupes! Las sondas FieldKit, como todas las sondas, tardan unos minutos en estabilizarse y los valores se ajustarán en breve.
8. Lista final de tareas pendientes antes de marcharte
Revisa que las juntas de la caja de tu FieldKit (tapa y placa de cableado) estén bien ajustadas y planas en las ranuras, no estiradas ni retorcidas, y que la tapa esté bien cerrada con los cierres de la tapa para lograr la máxima resistencia al agua.
Despeje después de sí mismo, deje la ubicación tal y como la encontró, y deje con la tranquilidad de que su estación está asegurada y funcionando.
Tómate un momento para repasar nuestras instrucciones de mantenimiento, la guía de instalación específica de cada sensor y la lista de verificación previa a la instalación para asegurarte de que todo esté listo antes de irte. No te saltes este paso.
Instalaciones meteorológicas
Estas son algunas de las cosas que debes tener en cuenta a la hora de instalar sensores meteorológicos.
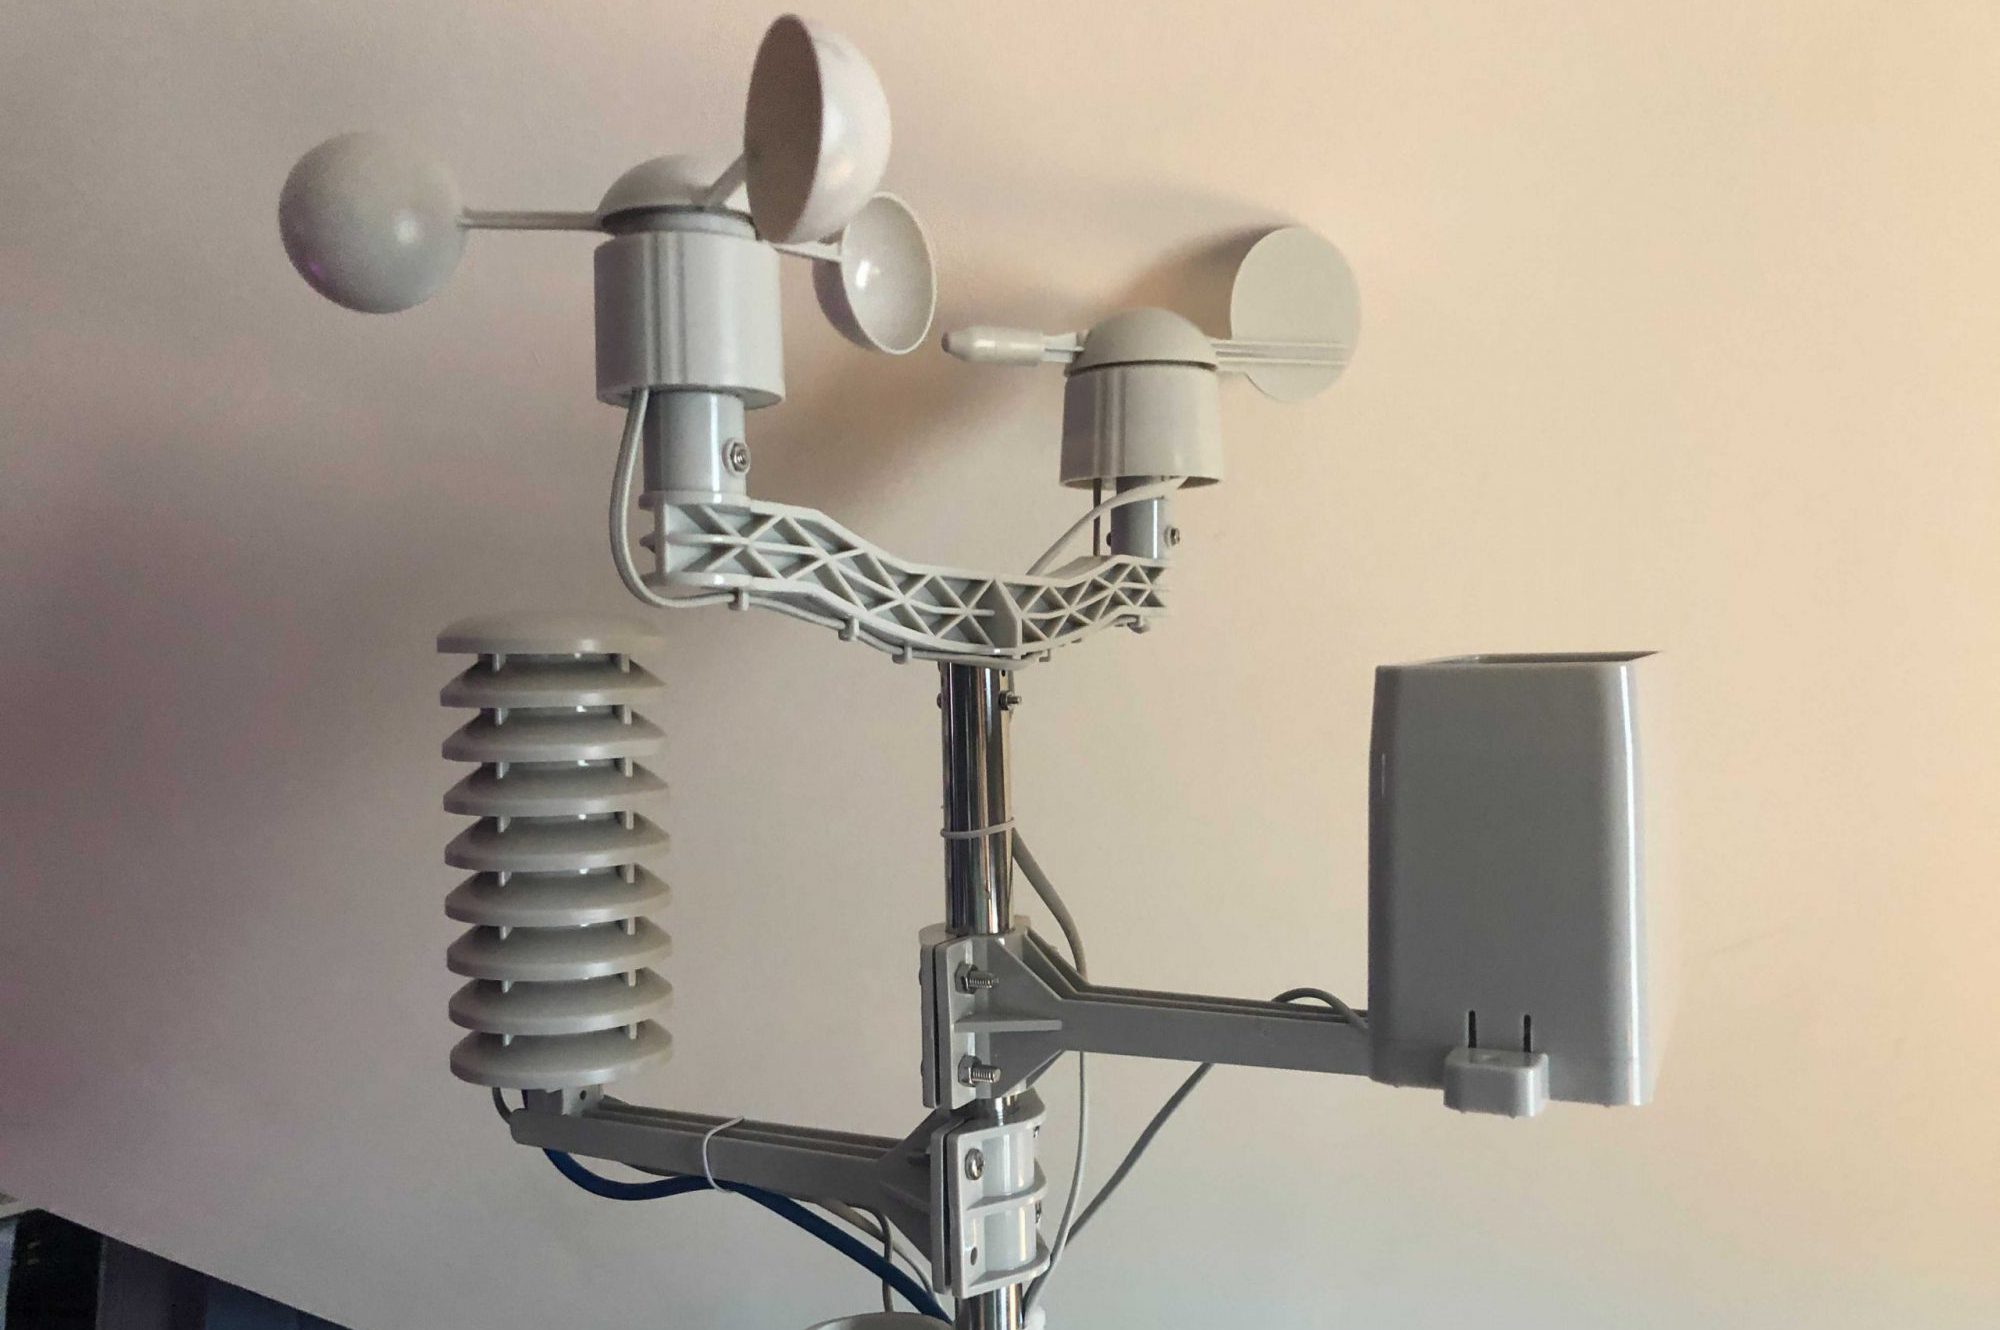
Asegúrate de que nada se haya movido en el camino
Asegúrate de que tu Pluviómetro esté libre del Anemómetro y veleta y no se cambió durante el ensamblaje.
Coloca las cosas a 5 m sobre el suelo
Asegúrate de que el Cluster de Instrument Meteorológico esté instalado en un área con flujo de aire no obstruido y se une a un mástil de más de 5 metros sobre el suelo. Esto es para evitar efectos límite y registrar mediciones precisas.
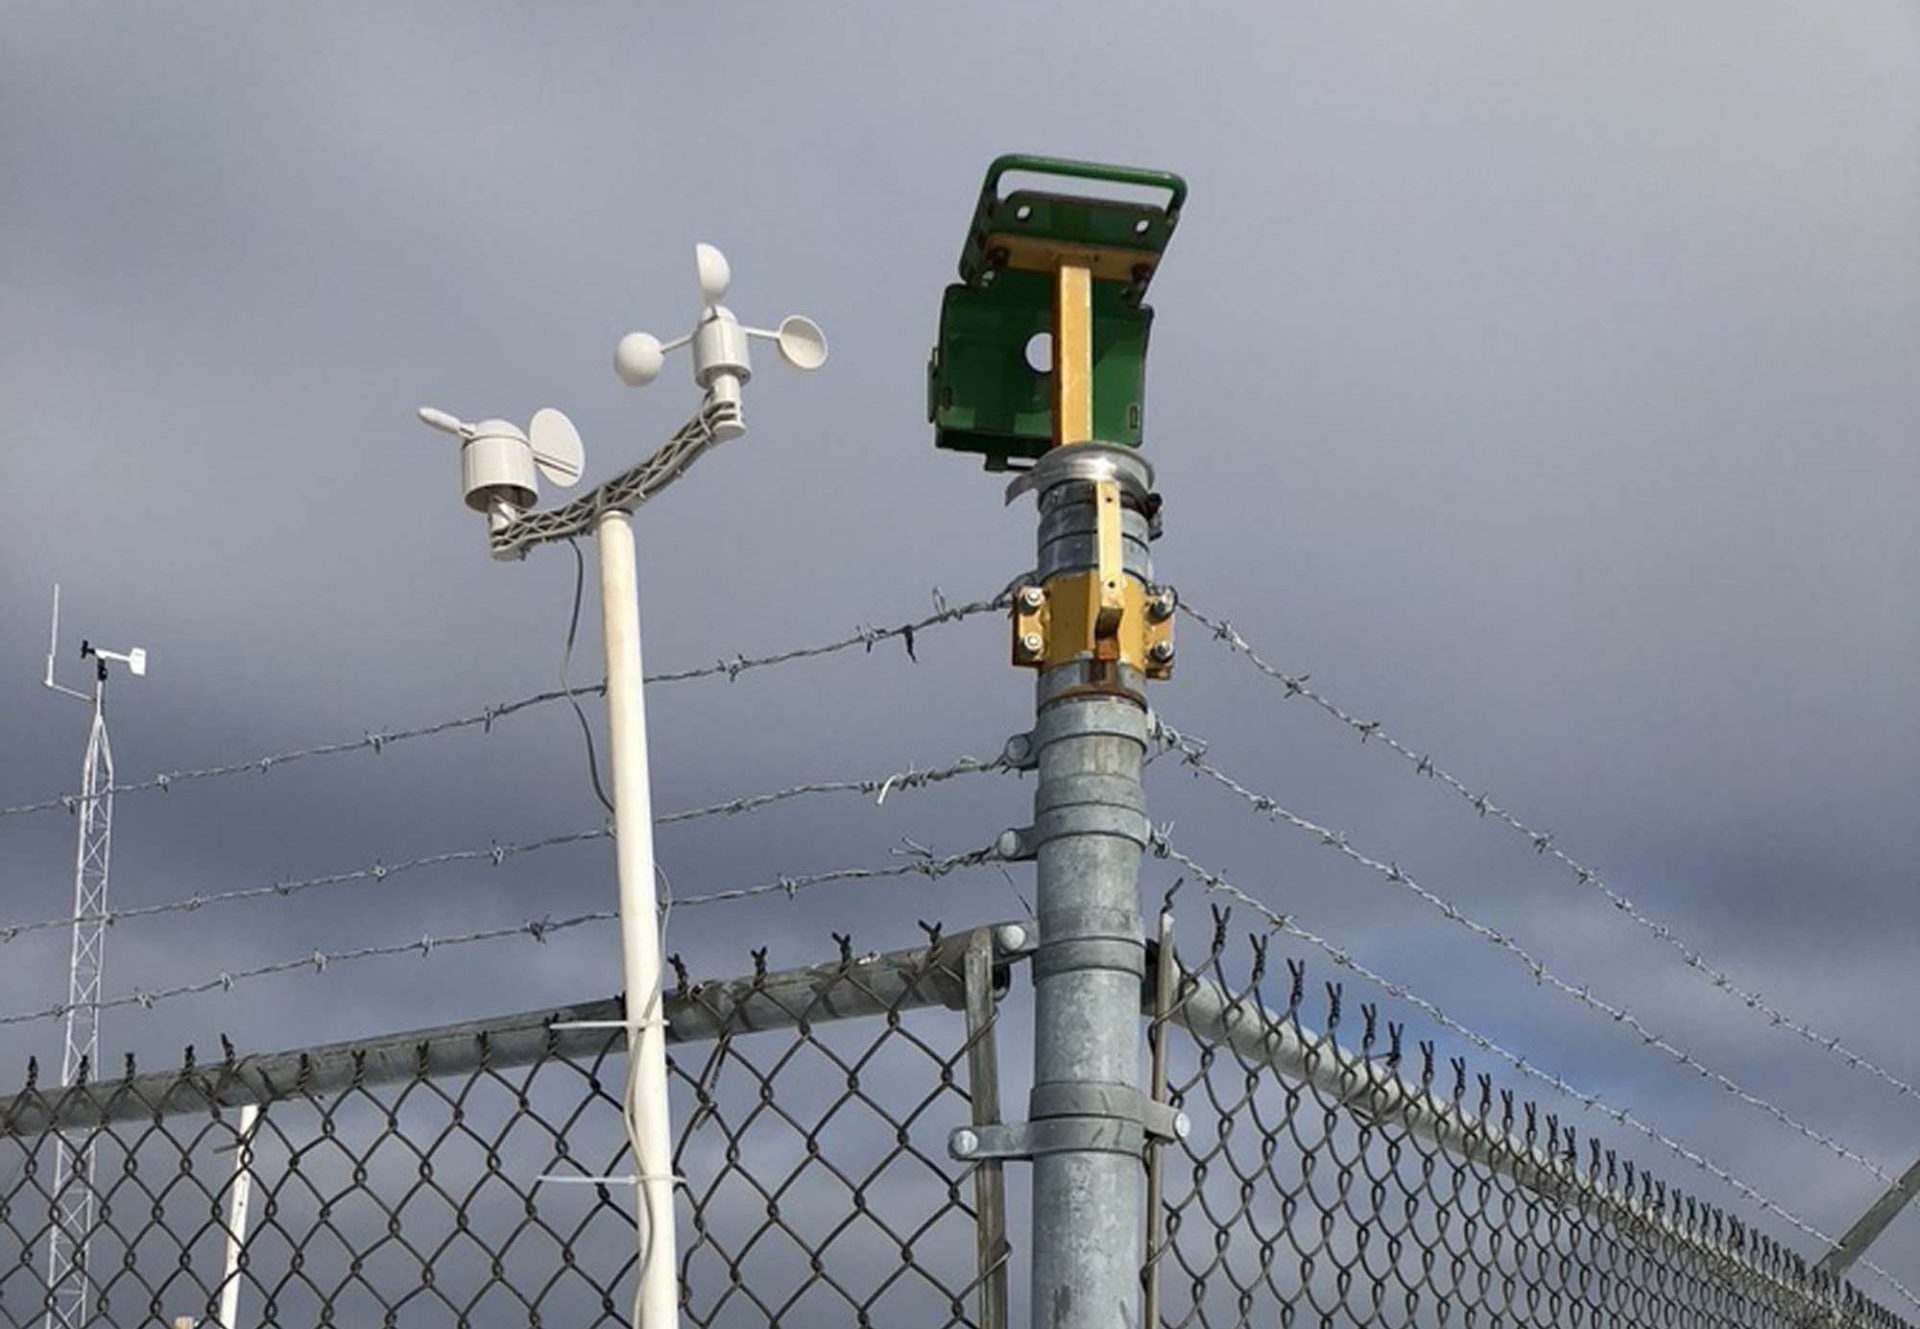
¿Todo está recto?
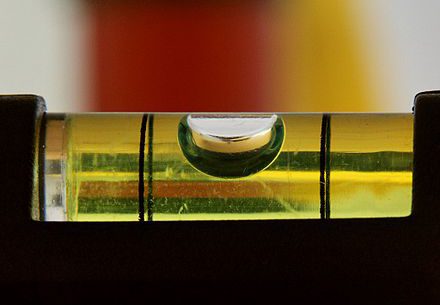
Asegúrate de que toda la cosa se desplome (poniéndote en pie). Para hacer esto, vincula una cuerda con un peso a la parte superior del brazo Viento vela, luego ajustar el mástil hasta que sea paralelo con la cadena. También puede colocar un nivel de burbuja en la parte superior del Gluviómetro.
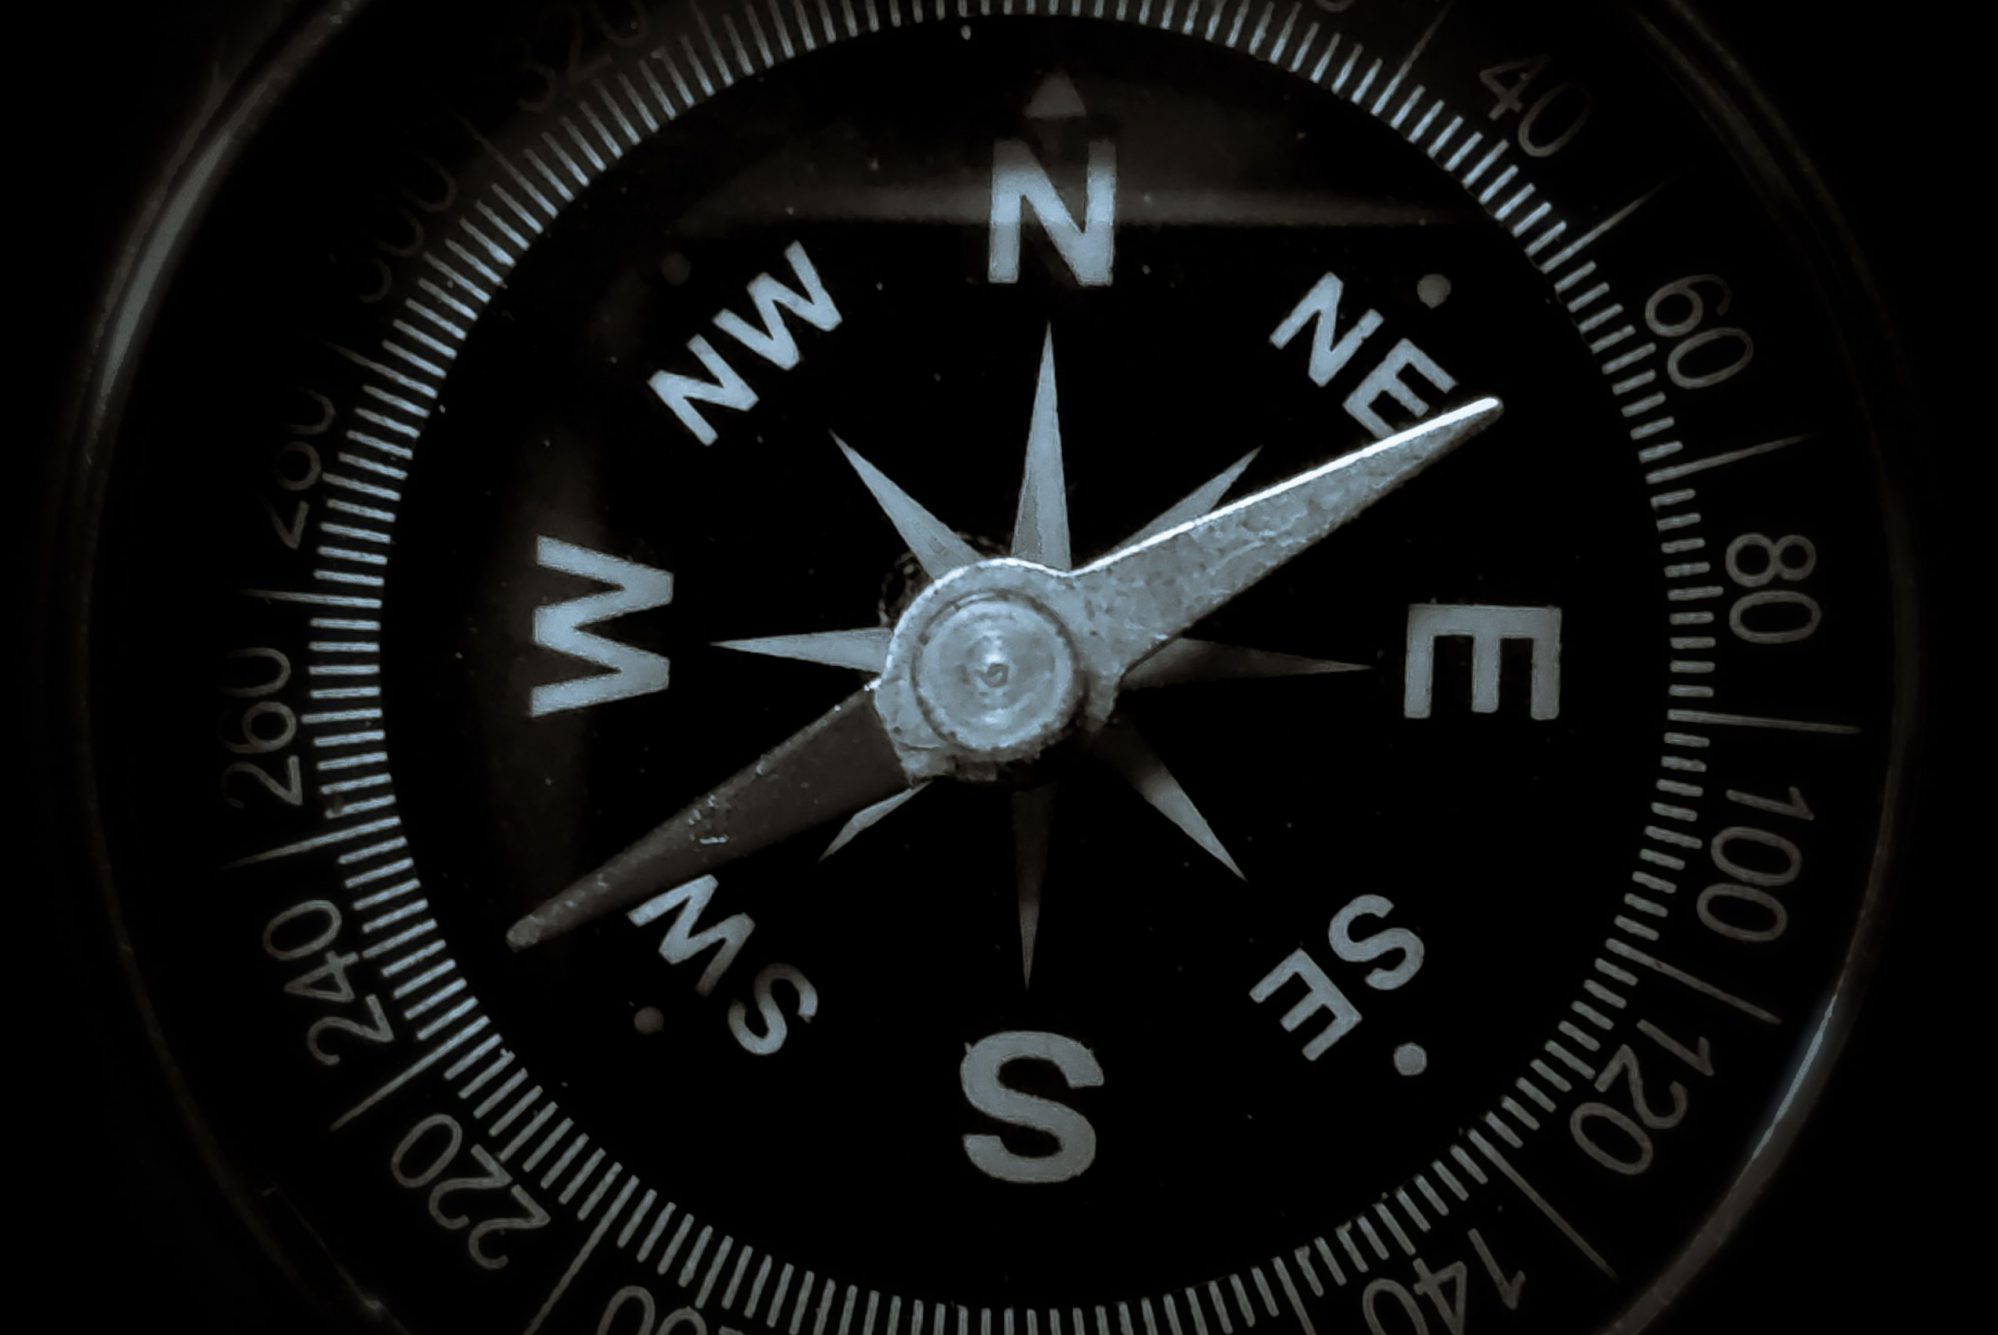
Alineación con el norte
Busque las direcciones cardinales en la veleta del viento – la colocará en el campo con la marca “N” que mira hacia el norte.
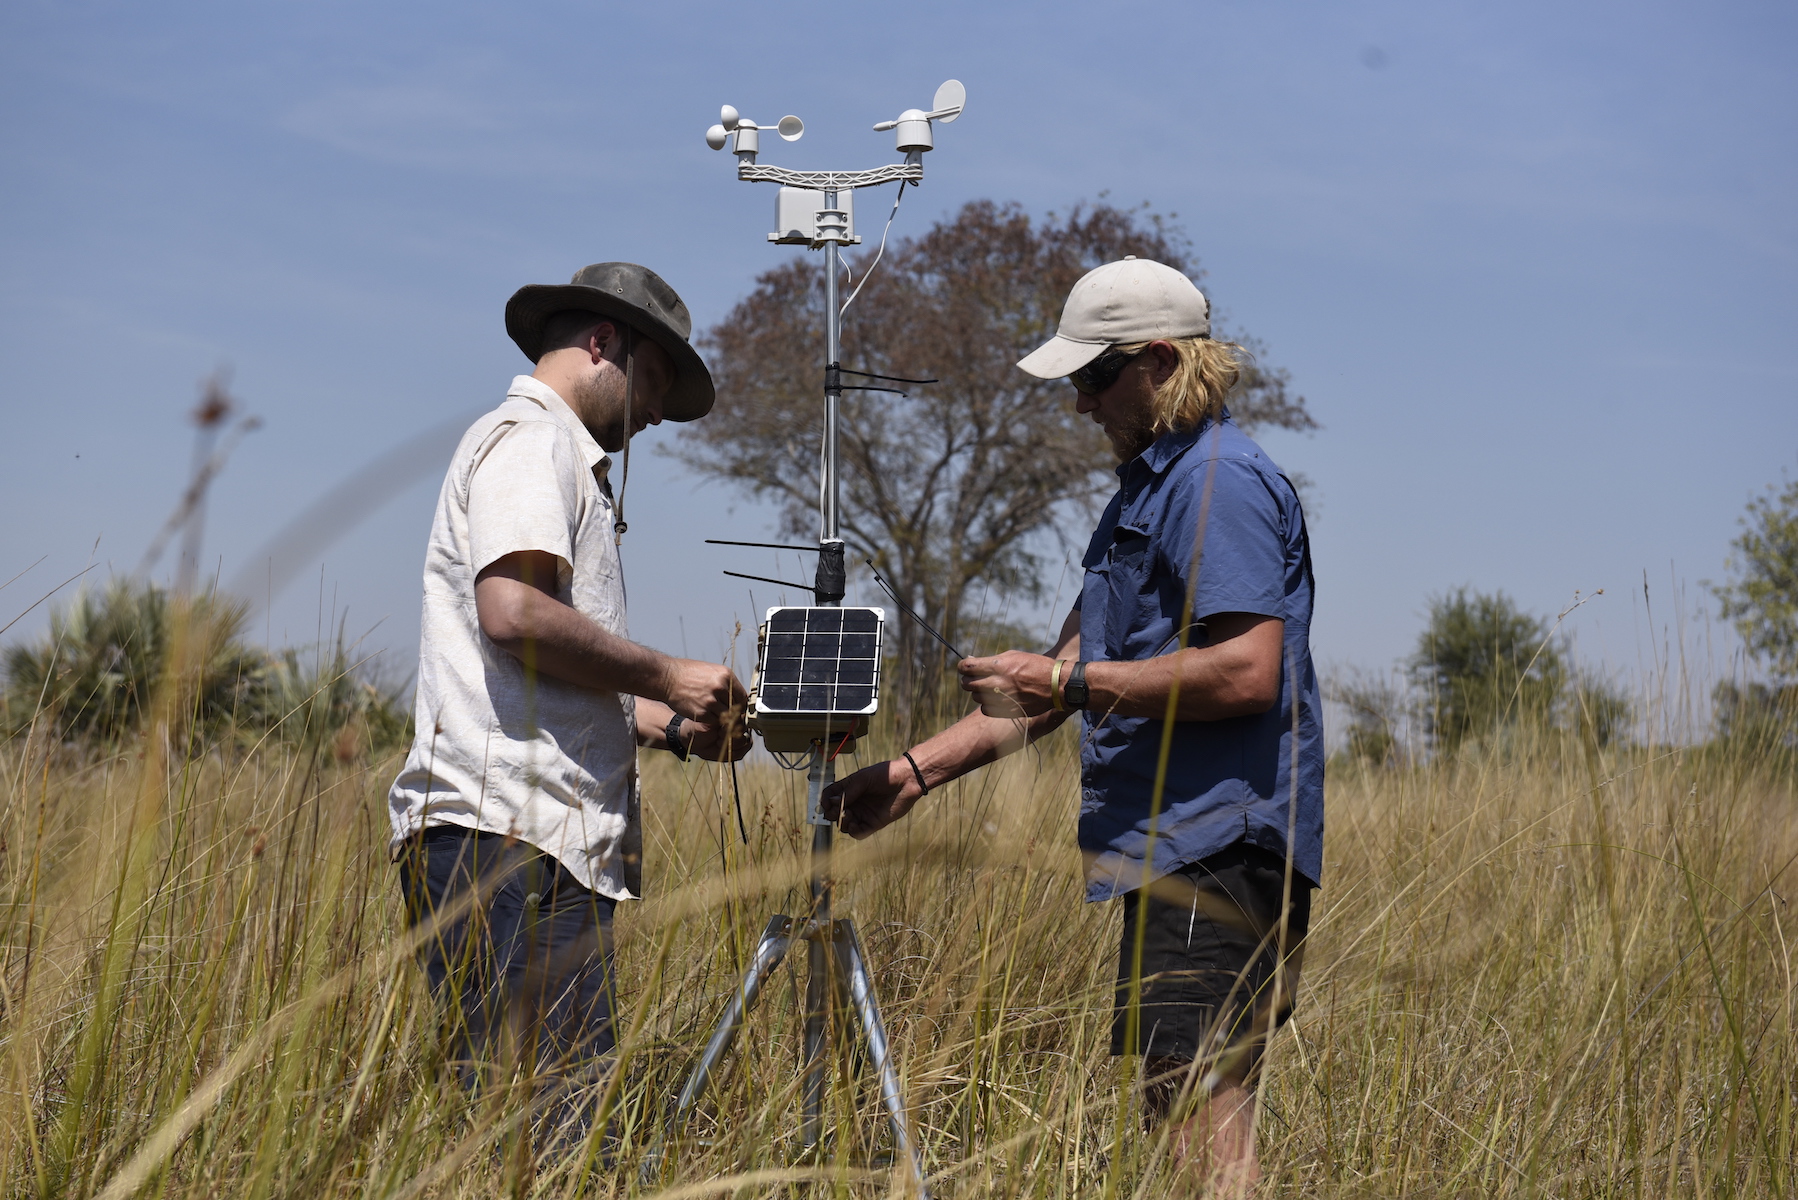
Asegúrala firmemente en caso de vientos fuertes
Anclar su estación de forma segura cuando la deje en el campo, especialmente si su ubicación puede experimentar vientos intensos.
Cubre los cables para protegerlos
Utilice algún tipo de tapa de cable (como telar de cable o chaqueta de cable de metal) para evitar que los cables sean masticados por rodents u otro tipo de vida silvestre.
Instalaciones hidrológicas
Estas son algunas de las cosas que debes tener en cuenta a la hora de instalar sensores hidrológicos.
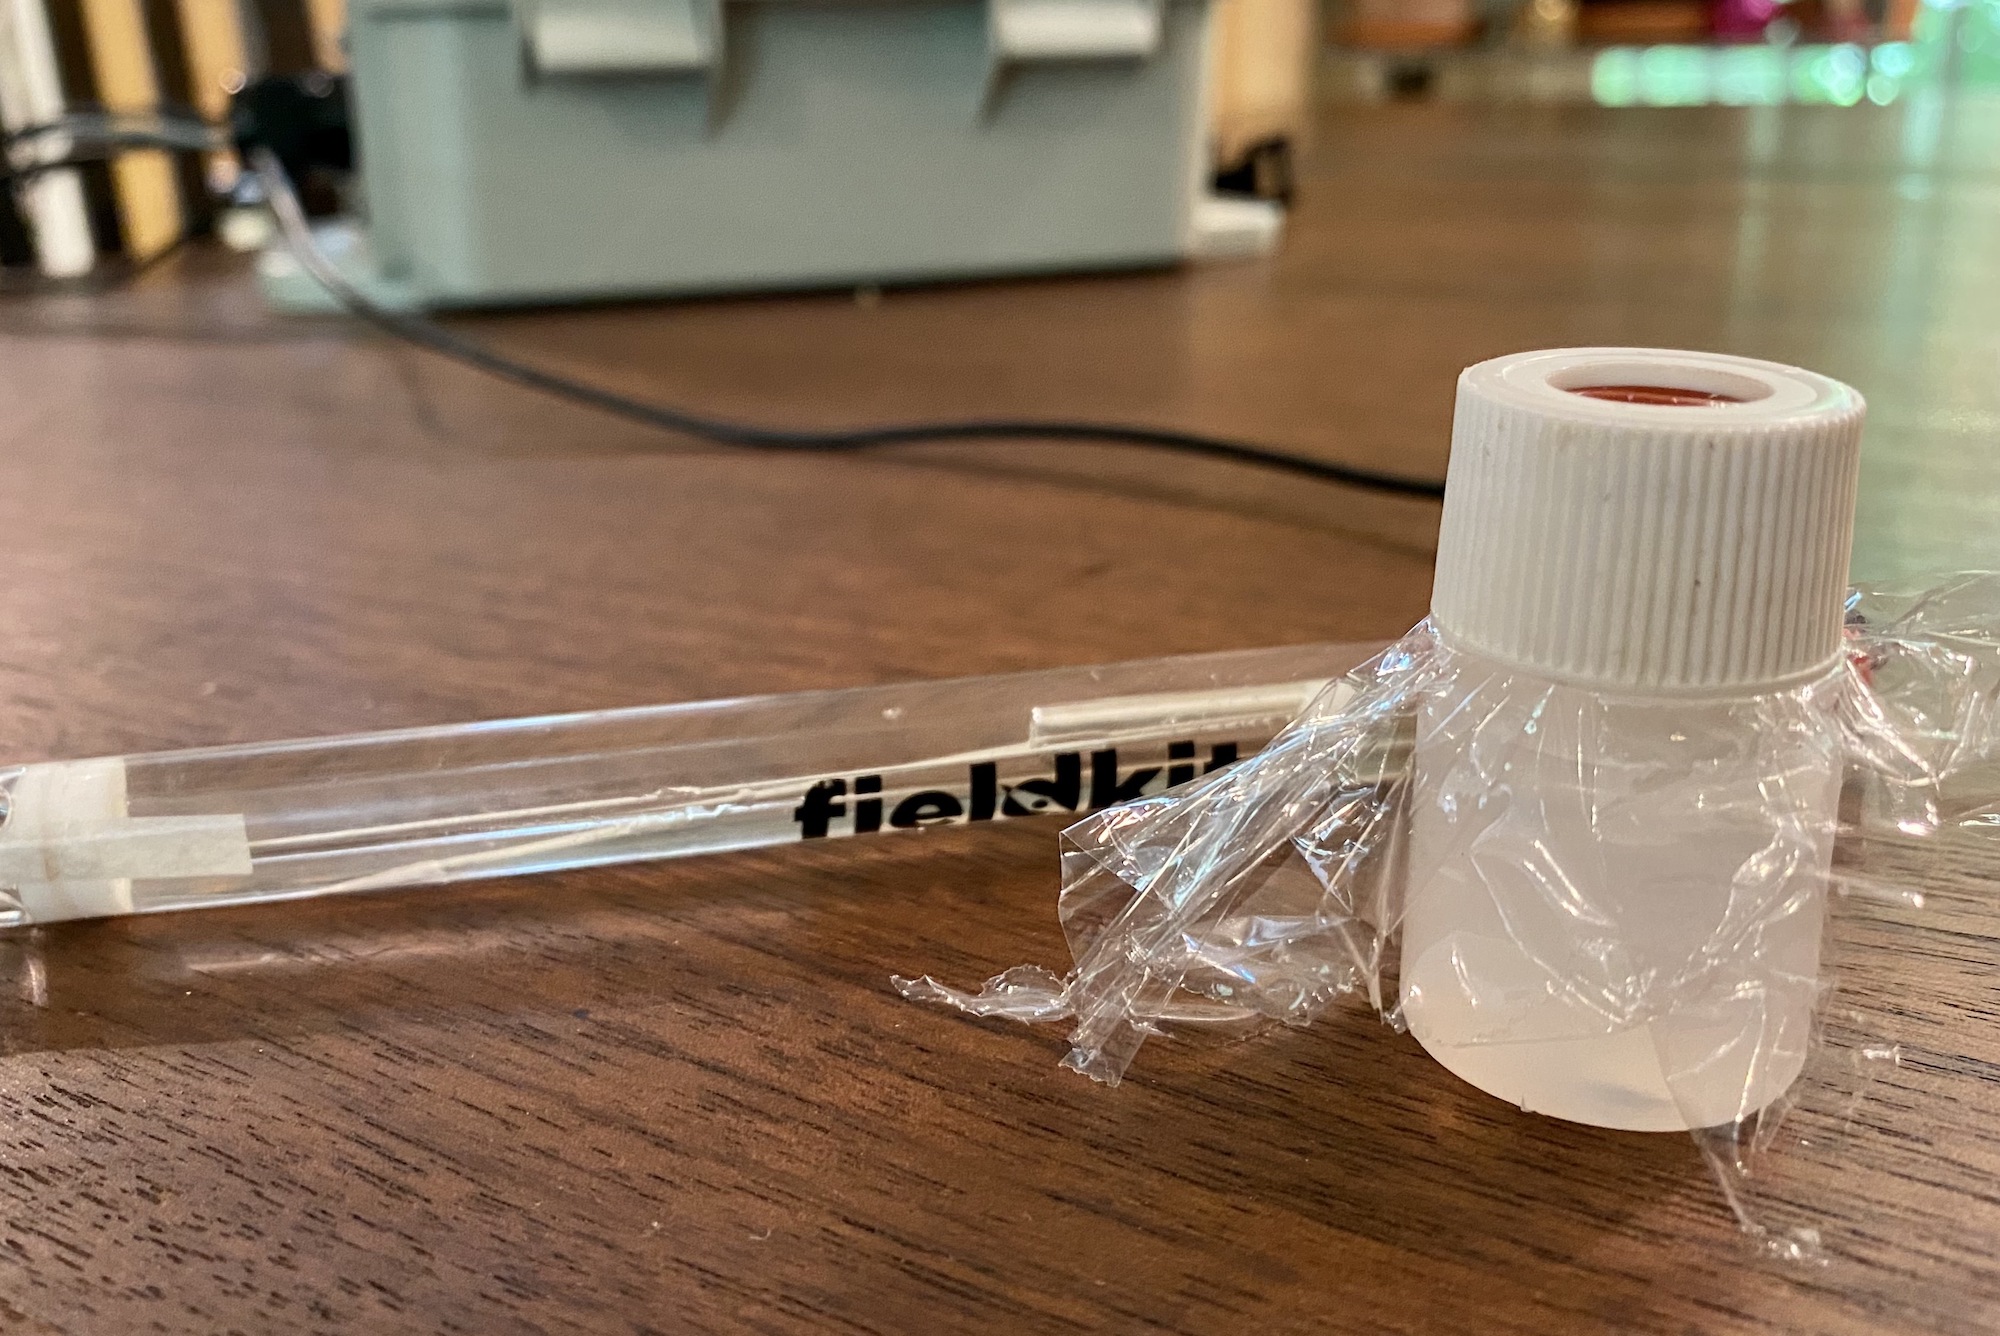
Retira las tapas protectoras de las sondas
Las sondas disueltas de oxígeno y conductividad eléctrica tienen tapas de protección negras que deben ser removidas antes de su despliegue. Retenga estas gorras y las reemplace en los extremos cuando no utilice las sondas para proteger su equipo, después de enjuagar sus sondas en agua limpia. La tapa disuelta de la sonda de oxígeno debe ser retirada, no sin tornillo, ya que el desenroscado puede moldear la membrana de la sonda. La sonda de pH tiene una tapa final que contiene una solución de búfer y un anillo de ojo para prevenir fugas de la solución. Al eliminar esta gorra, ten cuidado de no perder el ojo ni derramar la solución, ya que estos deben ser reemplazados al final de la sonda de pH cuando no estén en uso. Mientras está en el campo, Usted puede evitar que la solución se derrame colocando el envoltorio o una pieza cuadrada cortada de una bolsa de plástico sobre la parte superior del envase y luego follando la tapa en su lugar.
La solución reguladora de la sonda de pH es importante para conservar la vida útil de la sonda. Si derramas la solución, llena la tapa con agua limpia de manera provisional y reemplaza la solución lo antes posible. La solución empleada en las sondas de pH del FieldKit es una solución de cloruro de potasio (KCl) 4M. Para reemplazarla, puedes comprar la solución de almacenamiento de pH a un proveedor de material de laboratorio o seguir estas instrucciones. La solución no dañará tu piel, pero no debe ingerirse. Nunca guardes la sonda de pH en agua desionizada o destilada, ya que esto puede desionizar la sonda y dejarla inservible.
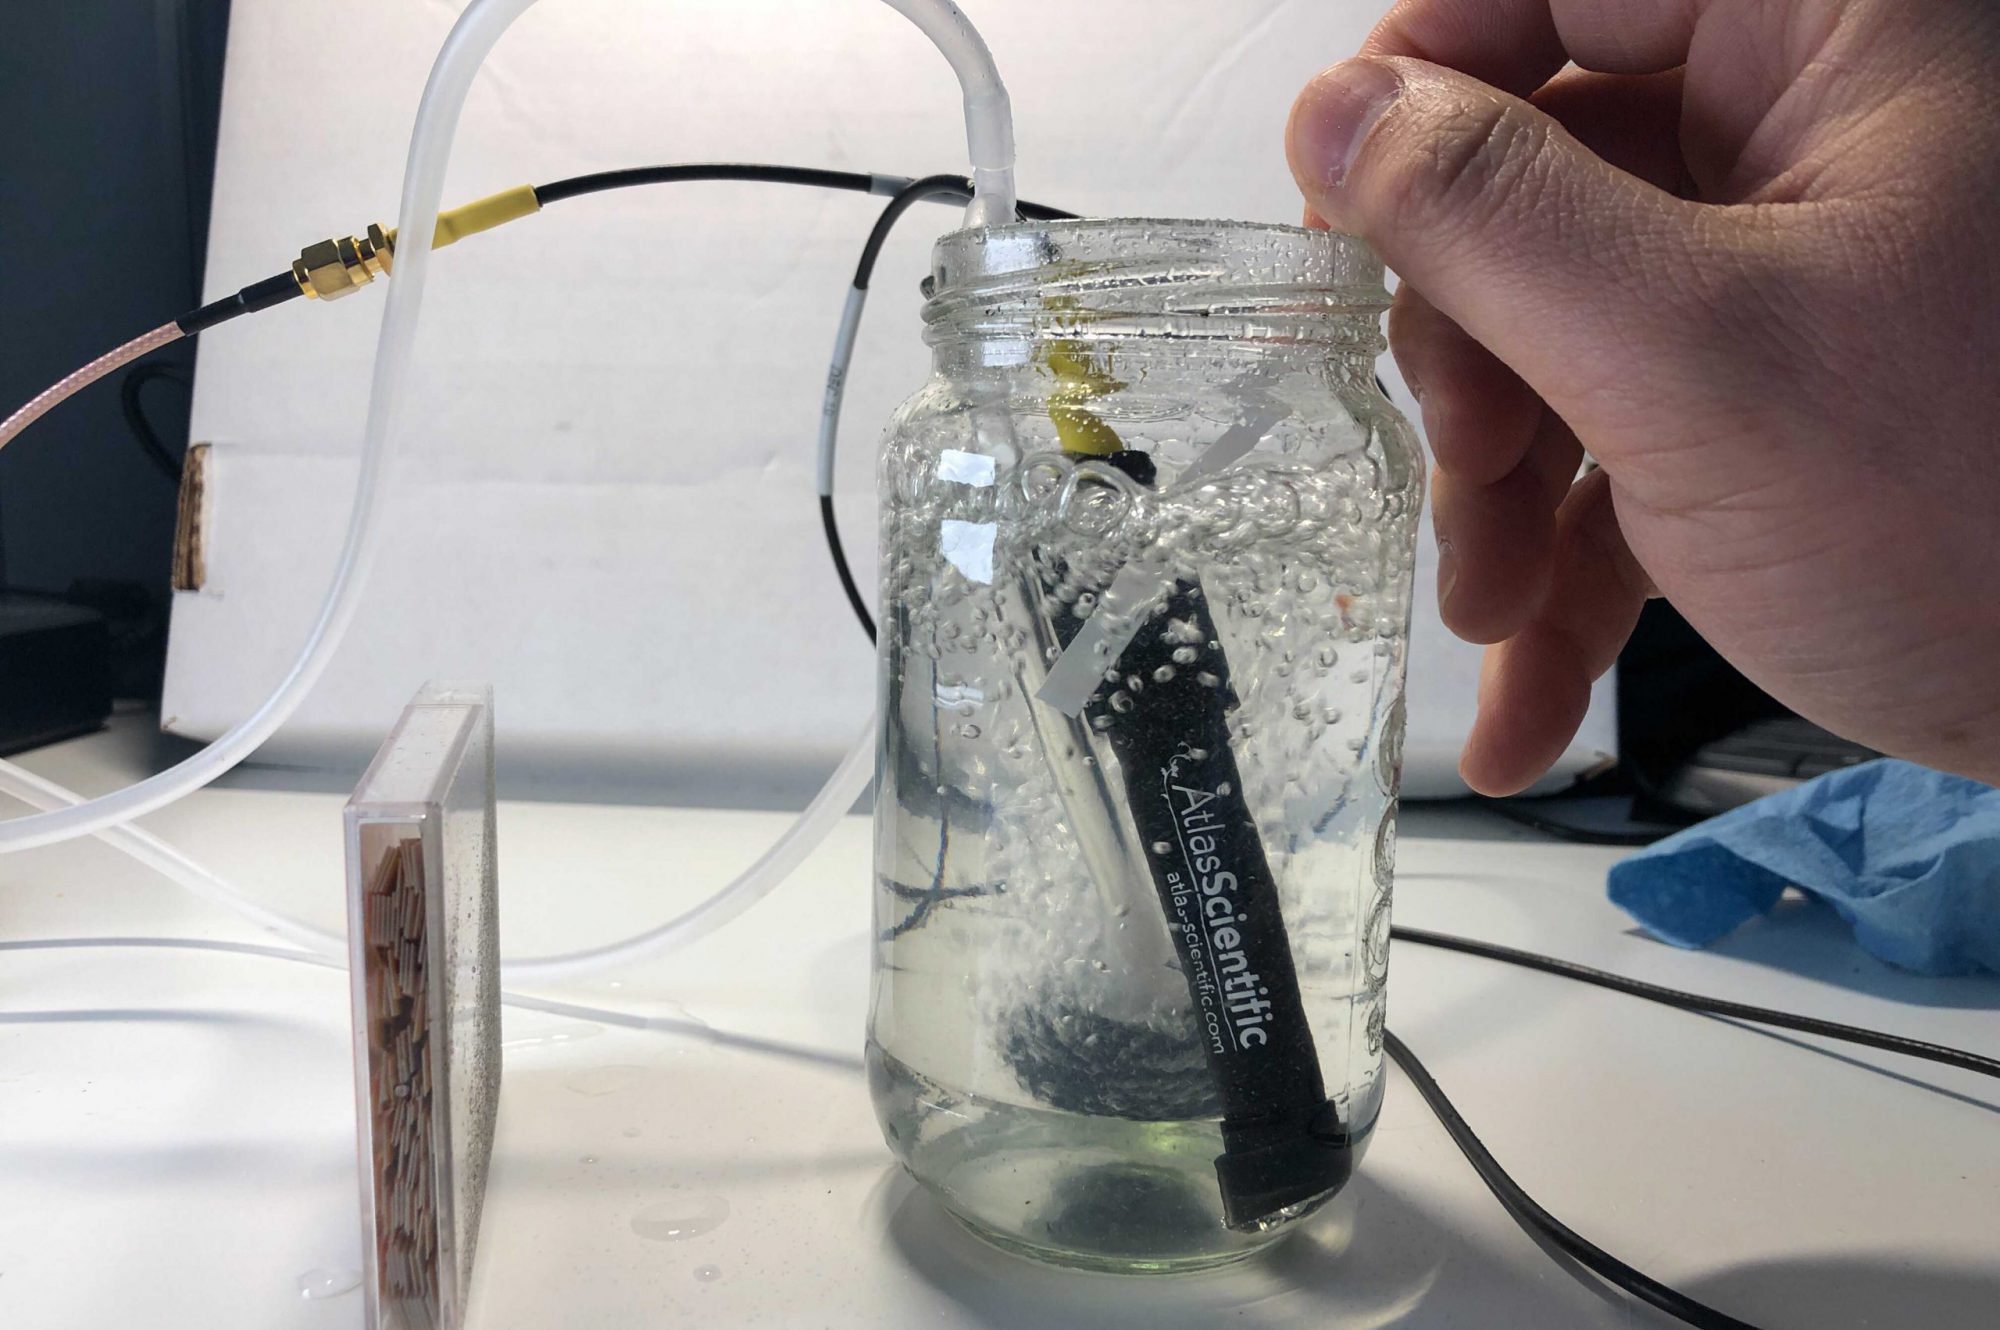
Sumergir el tom de las sondas
Asegúrese de que la parte inferior de cada sonda esté sumergida en el agua por lo menos 5 cm (~2 pulgadas). Toda la sonda y su cable son impermeables y pueden sumergirse de forma totalmente segura.
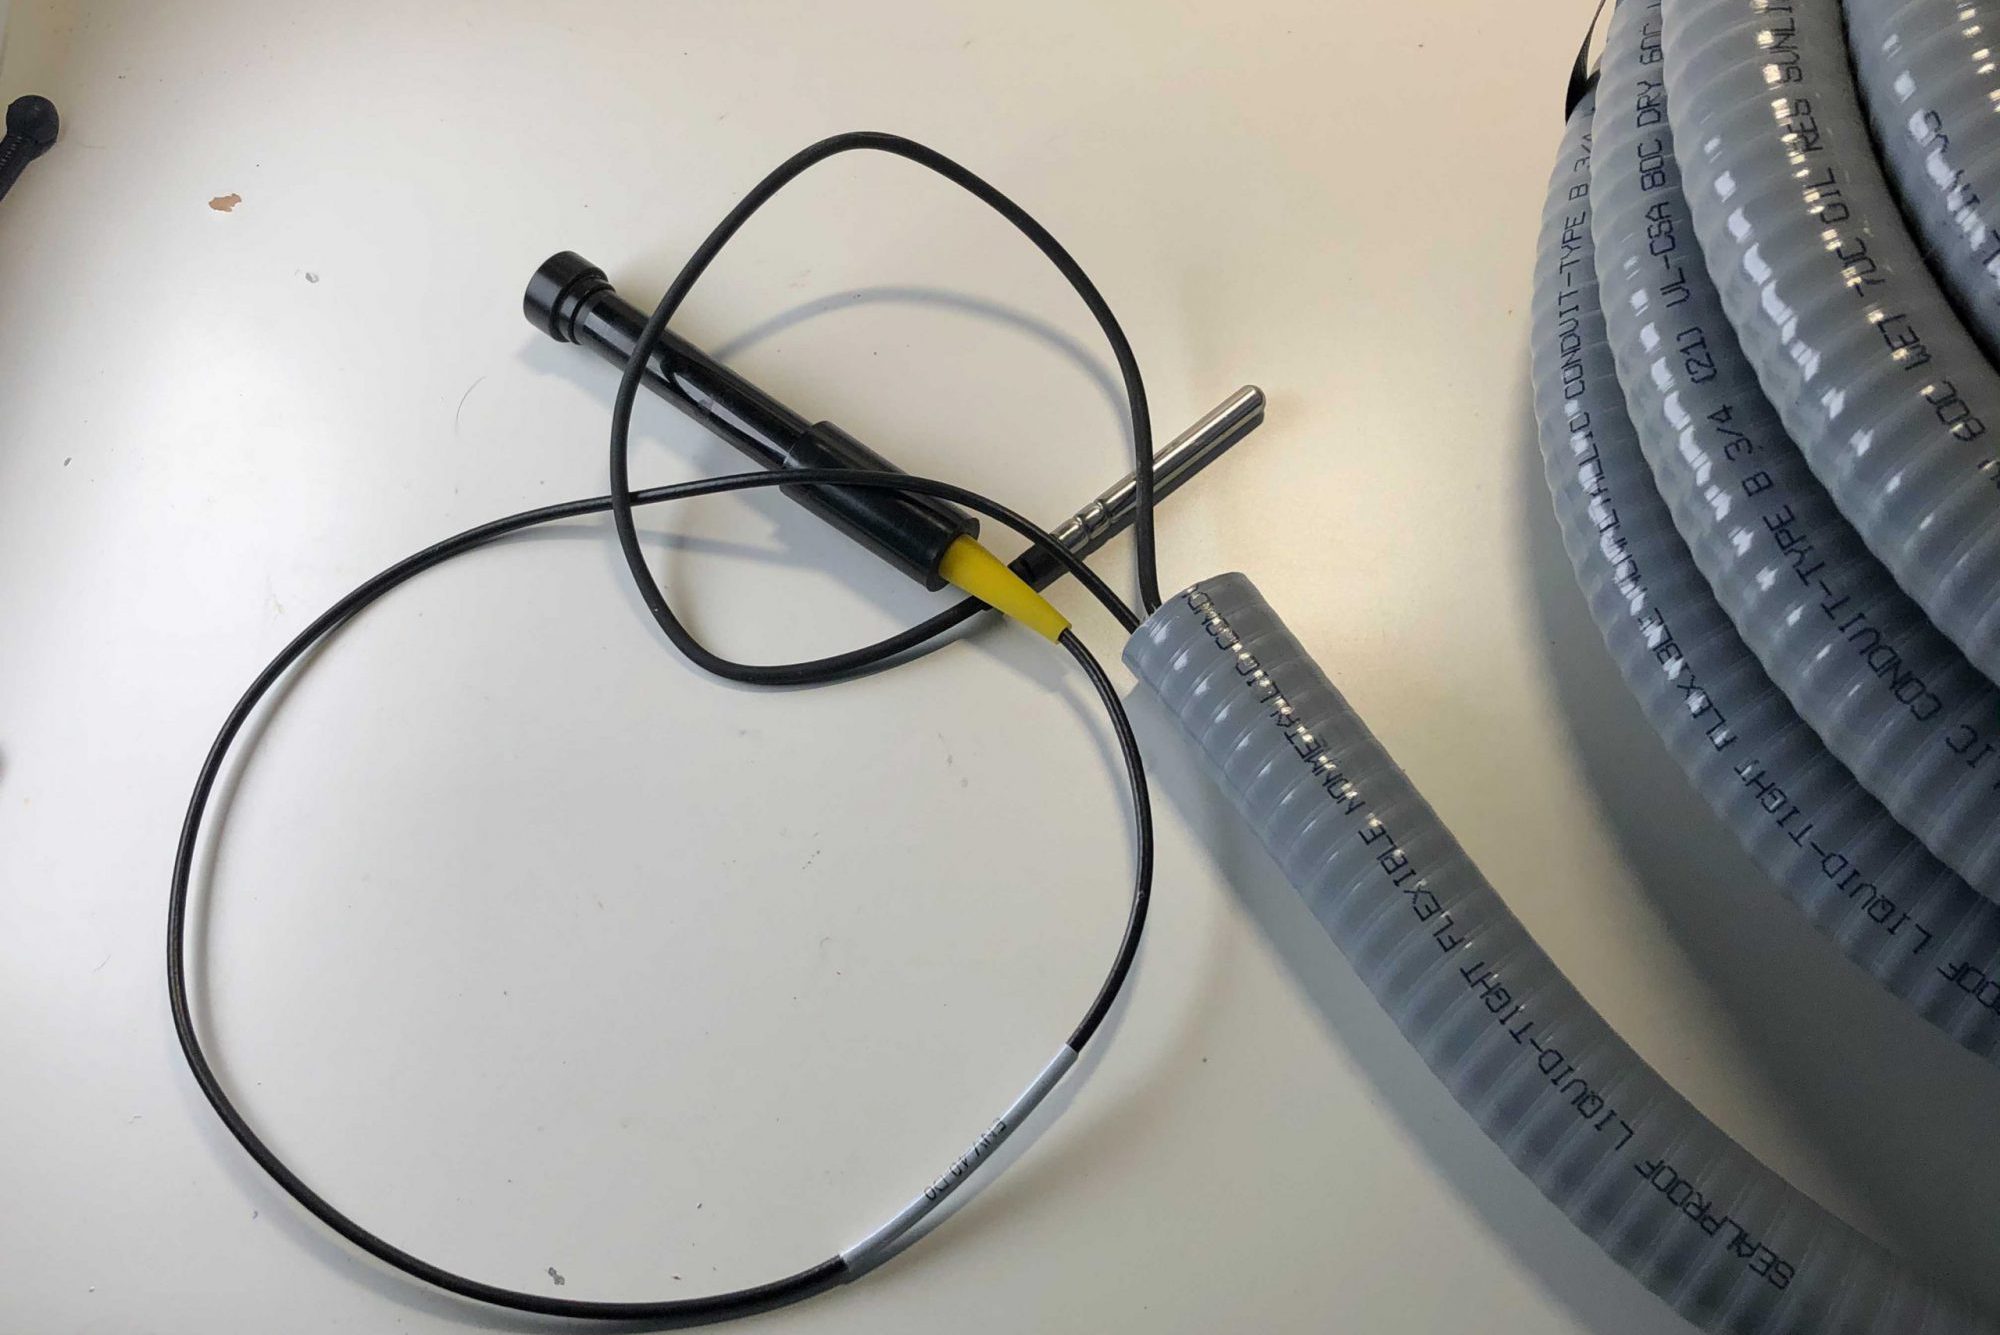
Proteger contra la congelación
Asegúrese de que las sondas de oxígeno disueltas, pH, Conductividad Eléctrica y Disueltas no puedan congelarse en su lugar, ya que esto los dañará. La sonda de temperatura estará bien en condiciones de congelación.
Tomar la medición inicial
Para la medición de la altura del escenario en cuerpos de agua con el sensor de distancia, asegúrese de obtener primero una medición de la altura del sensor sobre la cama directamente debajo de ella usando una bobina para saber de qué distancia restar para obtener la altura de su etapa.
Considere la colocación de sondas en el Pozo
Si se despliega al mover el agua, Considere colocar sus sondas en lo que se conoce como un pozo asfixiante: una sección de tuberías sobre la cama para permitir que el agua se ralentice y permita que el tiempo de contacto con sondas haga una medida precisa.
Usar portada de cable protector
Utilice algún tipo de tapa de cable (como telar de cable o chaqueta de cable de metal) para evitar que los cables sean masticados por rodents u otro tipo de vida silvestre.
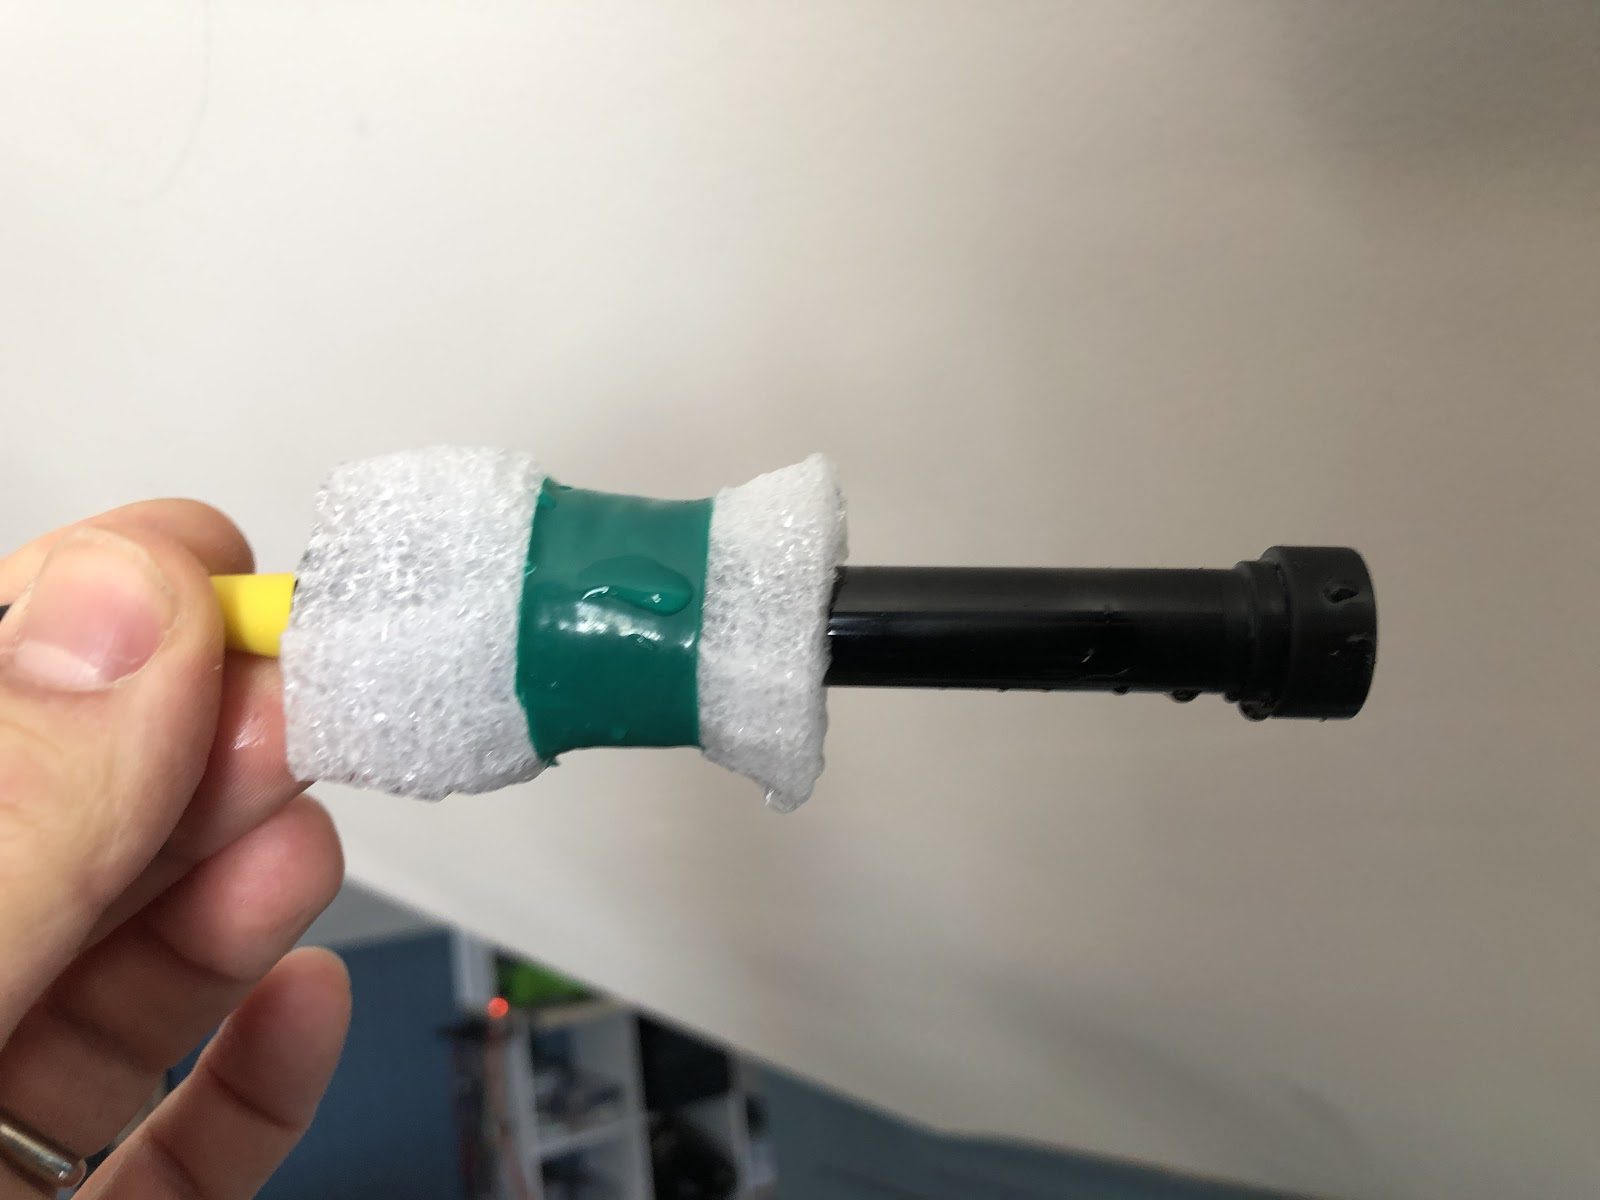
Adjuntar sonda usando float si es necearia
Si se despliega en agua con un nivel cambiante, se pueden adjuntar sondas para que estén completamente sumergidas, pero el oxígeno disuelto se mide con respecto a la sobrepresión, que es la suma de la presión atmosférica y la presión de la columna de agua. Para que esto sea lo más simple posible, Recomendamos poner esta sonda en un flotante dentro de un pozo asfixiante para que siempre esté sumergida por la misma cantidad. Un simple flotador se puede fabricar con espuma de polo de celdas abiertas y cinta eléctrica. ¡Asegúrate de que la parte inferior de la sonda esté sumergida por 5 cm!
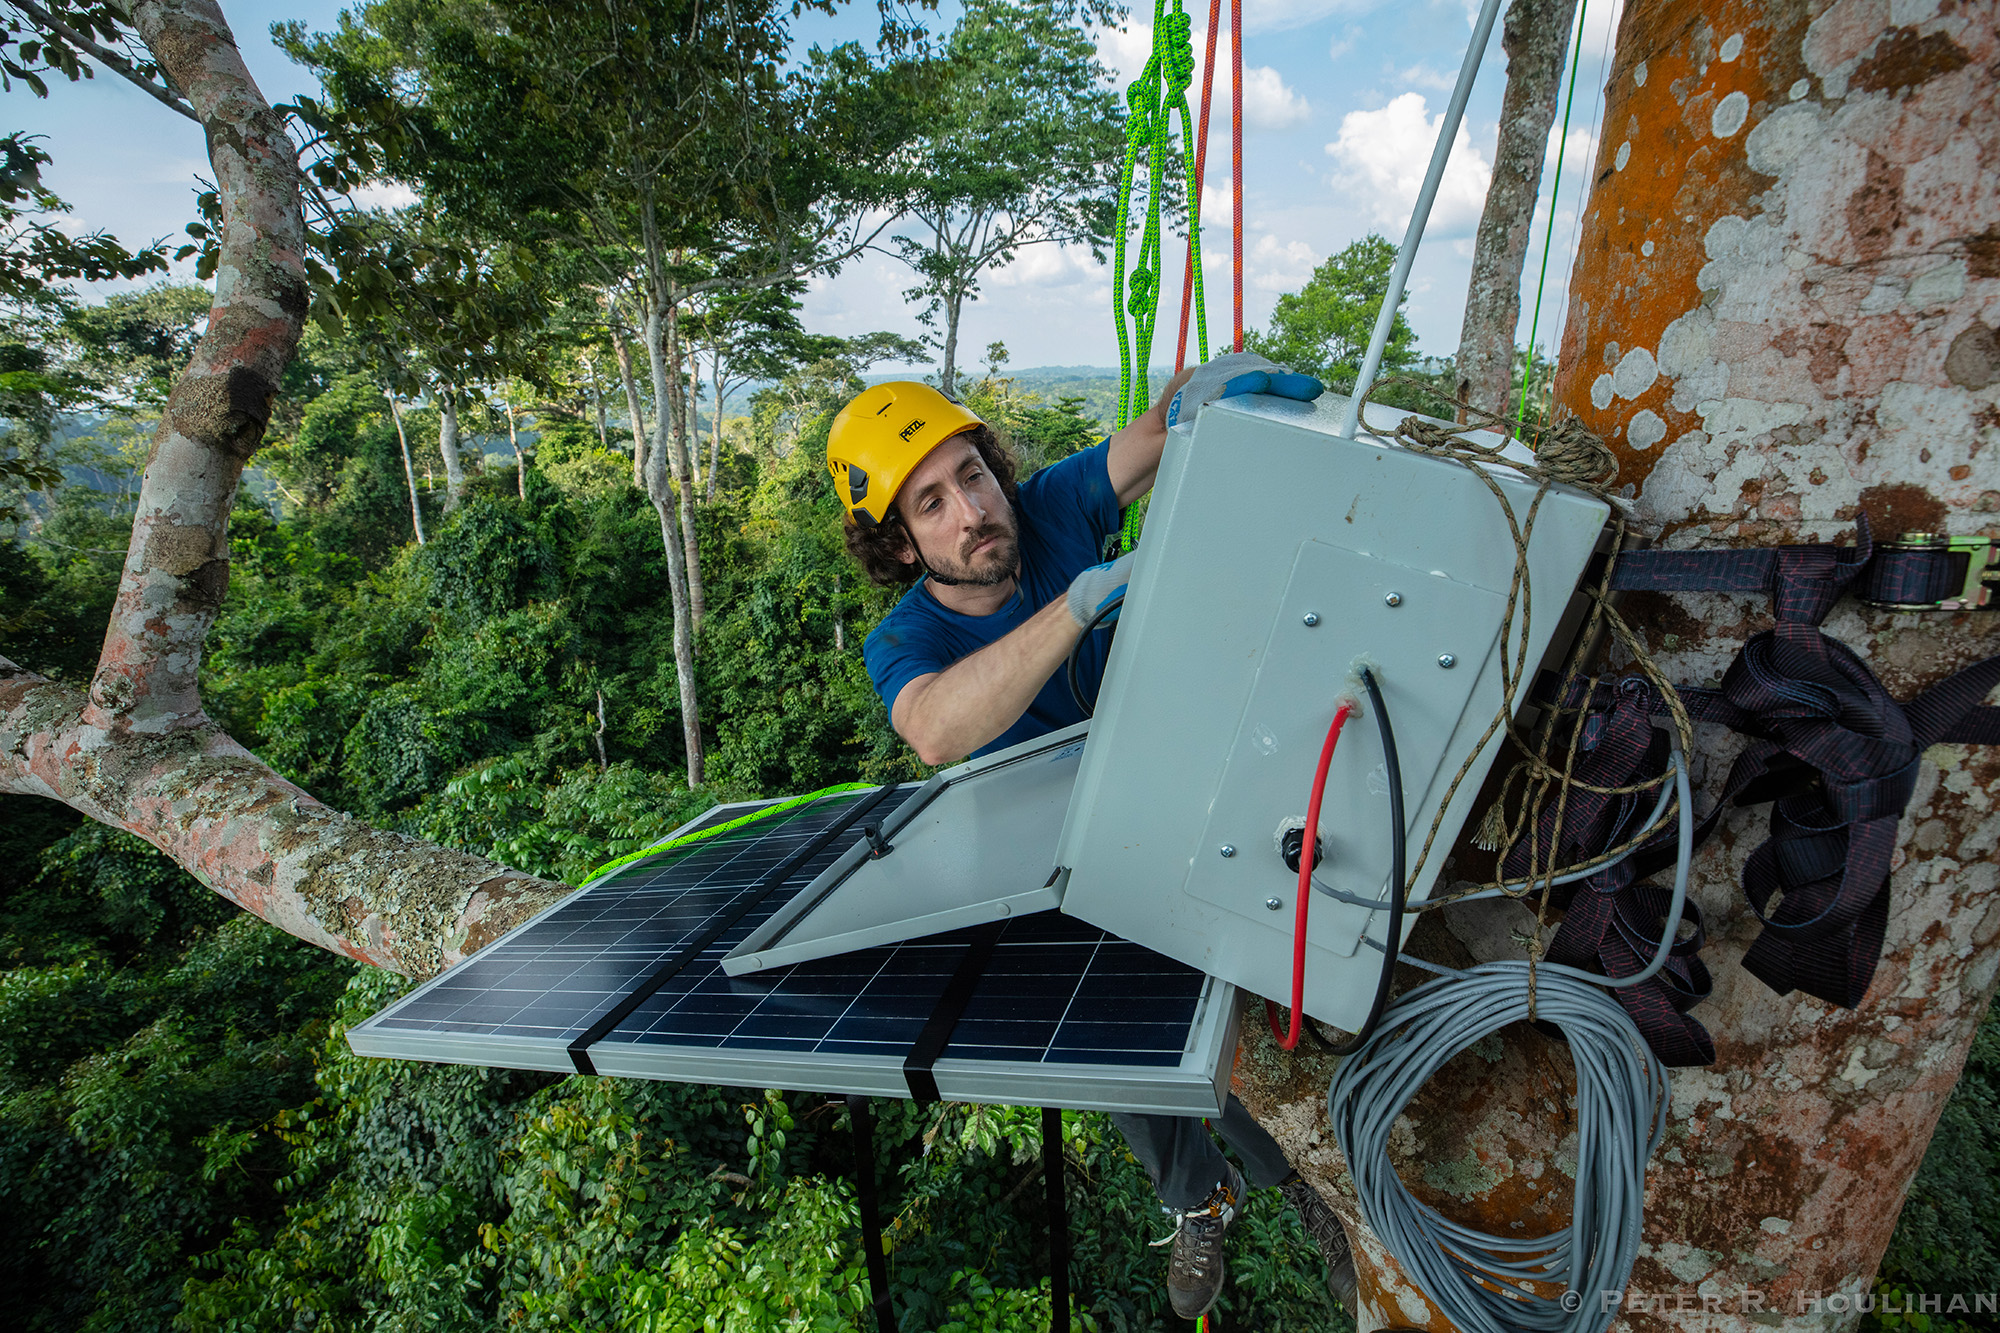
Instalaciones de paneles solares
Estas son algunas de las cosas que debes tener en cuenta a la hora de instalar paneles solares.
Antes de conectar los cables de la batería, del panel solar y del botón, revisa que los estés conectando a las entradas correctas (etiquetadas como «BATTERY», «SOLAR» y «BTN»). Conectar los cables en los lugares incorrectos puede dañar permanentemente el FieldKit.
Optimizar exposición solar para paneles solares
Asegúrese de que sus paneles solares están mirando hacia la dirección en la que obtendrán más sol (i.e. No estar sombreado por árboles o edificios). Una pauta general es montarlas en un ángulo correspondiente a su latitud y hacia el sol.
Por ejemplo, si me encontraba a 42° N y tuve una proyección de árboles hacia el este, Yo apuntaría mi panel hacia el suroeste en un ángulo de 42° de una línea paralela al suelo. Si yo estuviera a 31° S, con el cribaje de los árboles al noroeste, apunta mi panel al noreste a 31° grados.
Usar portada de cable protector
Utilice algún tipo de tapa de cable (como telar de cable o chaqueta de cable de metal) para evitar que los cables sean masticados por rodents u otro tipo de vida silvestre.
¿Tienes dudas de algo?
Para más ideas y ayuda, pregunta en el foro de la comunidad FieldKit.